
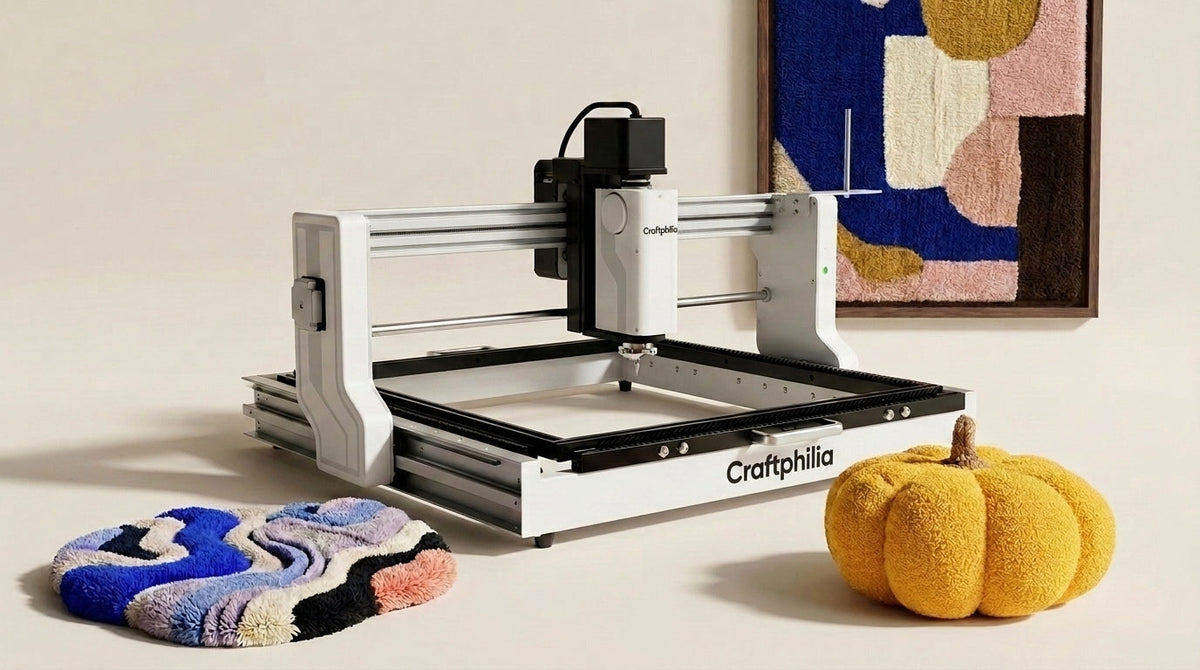
Most people start with a rug, and plenty of good work never leaves the floor. But the same machine, the same yarn and the same primary cloth will also give you a wall hanging, an irregular shape, a carved relief, or an object with actual volume — a bag, a lampshade cover, a tufted football.
The tufting barely changes. What changes is the design file you set up beforehand, and what you do after the piece comes off the frame.
There's one idea underneath all of it: a floor rug is held flat by gravity. Everything else has to hold itself.
Wall art: staying flat on its own
A wall piece hangs from one or two points, and the corners are where trouble shows — curling inwards, a wavy bottom edge, sides peeling away from the wall.
Two habits prevent nearly all of it.
Let the glue cure completely on the frame. Cut it down early and the fabric pulls as it relaxes — and once a wall piece has curled, it doesn't flatten back out. Our rug finishing guide covers the glue stage in full.
Go light on the backing. Floor rugs need backing to grip the floor and survive shoes; wall art has neither problem. Felt or cotton canvas is plenty to seal the glue and give the back a clean face — skip the non-slip layer entirely. If the piece needs stiffness, that should come from a thin board behind it, not from heavier fabric.
Shaped and irregular outlines
The machine tufts inside your outline and leaves the surrounding cloth bare, so you cut the shape out once the glue has cured.
- Curves. Straight edges fold onto the back easily. On curves, snip small tabs into the cloth allowance before folding, or the fabric bunches instead of sitting flat.
- Inside corners. The tightest spots — fold rather than cut wherever you can.
-
Border allowance. Leave a generous border of bare cloth around your outline before you tuft. Folding around a curve eats more fabric than folding a straight edge, and you can't add allowance after the fact.

Mounting: how to actually hang tufted work
| Method | Best for | How it works |
|---|---|---|
| D-rings and picture wire | Most wall art up to moderate size | Two D-rings near the top corners on the back, wire strung between them, hung on a picture nail or Command hook. What most makers selling wall art use. |
| Backing board | Anything that needs to stay rigid | Thin hardboard, plywood or dense foam board cut 3–5 mm smaller than the outline so the pile hides the edge. Glue the piece down, weigh it flat while it dries, staple the edges to the back. |
| Wooden dowel | A loose, tapestry-style hang | A rod run through a sewn sleeve along the top edge. Reads as textile rather than framed art. |
| French cleat | Large or heavy pieces | A bevelled strip on the wall and a matching one on the back. The two lock together, sitting flush and stopping heavy pieces sagging in the middle. |
| Heavy-duty Velcro | Lighter pieces, no visible hardware | Sits flat against the wall with nothing showing. Check the weight rating honestly. |
| Magnetic rail | Work you swap seasonally | Worth considering if pieces come on and off the wall regularly. |
Check the weight rating on your hooks. Dense cut pile is heavier than it looks. And once it's up: keep it off a wall that gets hard direct sun, and leave a small air gap behind the backing so moisture doesn't sit trapped against the wall.
Carved relief: depth on a flat surface
Before the section on actual three-dimensional objects, it's worth separating the two, because "3D" gets used for both and they're not the same thing.
Carved relief is depth cut into a flat piece. The piece still hangs on a wall or lies on a floor — what changes is that the surface has height variation in it.
Depth in tufted work comes from carving, and carving only reads along an edge.
Cut a groove down the middle of a solid red panel and you'll barely see it — trimmed red pile and untrimmed red pile look identical. Make that section blue, carve along the seam, and the shape appears instantly. The eye reads height off the boundary, and the boundary needs colour contrast to exist.
Which means you decide where a piece has depth when you choose colours on screen, not later when you pick up the trimmer. Mark where you want relief while designing, and make sure every intended groove has a clean colour seam to follow.
Pile height sets the ceiling. Craftphilia machines tuft at around 14–16 mm before trimming, so every groove lives inside that range. Tilt the blade down into the seam rather than skimming flat across the surface — our guide to carving clean edges covers it properly.
Three-dimensional objects: tufting in panels
Now the tufted piece stops being the whole thing and becomes one surface of an object with volume — a cushion, a bag, a football, a lampshade cover, a stool top.
The principle behind all of them is the same, and it surprises people:
You don't tuft a three-dimensional shape. You tuft flat panels and assemble them into one.
A tufted football isn't tufted as a sphere — it's twelve pentagons and twenty hexagons, each tufted flat, cut out, and sewn together. A tufted pumpkin is a set of identical segments. A bag is a front, a back and a gusset. The volume arrives at the sewing table, not at the frame.
The basic sequence
- Tuft each panel flat, leaving a border of bare cloth around it to sew through.
- Use a flexible glue. Standard rug adhesive dries hard, which is right for a floor. An object that gets squeezed, stuffed or bent will crack along the crease — use a flexible latex.
- Cut out and stitch, right sides facing, leaving a gap.
- Turn, stuff or fit, and close the opening by hand.
Why panels have to match
This is where three-dimensional work gets difficult, and it isn't the sewing.
Six petals have to be the same size or the flower sits lopsided. Twelve pumpkin segments have to be the same width or the seams pull crooked. A football's panels have to match on all three counts — outline, pile height and density — or the sphere comes out lumpy, and a lumpy sphere reads as a mistake rather than a style.
By hand, that means matching outline and density by eye, twelve or thirty-two times in a row. It's the same problem as running a production batch, except the pieces have to match each other rather than match a set — and the failure is visible in a single object rather than spread across an order.
Drawing the panel once and running it repeatedly is the whole reason machine-tufted objects assemble cleanly.
Objects worth trying
- Cushions. The usual starting point. One tufted face, a fabric back — velvet and linen both sit well against cut pile.
- Balls and soft sculpture. Footballs, pumpkins, flowers, characters. Repeated identical panels, stuffed after assembly.
- Bags and pouches. Tufted front panel, lined interior, fabric or leather strap. The pile takes wear surprisingly well.
- Lampshade covers. A tufted sleeve over an existing frame or drum. It won't glow — pile is opaque — so the light reads as a halo around the edges rather than through it. Use LEDs only, and leave clearance: acrylic yarn and hot bulbs don't belong together.
- Stool and chair seats. Wrapped over foam and stapled underneath. Tuft the piece larger than the seat so there's enough to pull tight over the edges.
- Mirror frames. Tuft the frame, cut out the centre aperture, mount the mirror behind it.
- Patches, pins, keyrings, ornaments. Small pieces are the cheapest way to test a technique — and a tufted patch sewn onto a jacket works where tufting into the garment doesn't.
What holds it all together
Every version of this work depends on decisions made before any yarn moves: the outline you'll cut to, where the colour lines fall, and whether the back needs a board or a seam.
Carving, folding, sewing and mounting all rely on a base that comes out even — consistent height, consistent density, edge to edge. That consistency is what makes a fold sit flat, a carved groove read cleanly, and two panels meet without puckering.
The base is the easy half to get right. The shape you decide on, and how you finish it, is where the work is actually yours.
Frequently asked questions
Can you tuft a three-dimensional object directly?
No. Tufting happens on flat cloth stretched in a frame, so every three-dimensional piece is built from flat panels cut out and sewn together. The volume comes from assembly and stuffing, not from the tufting itself.
Do I need a tufting machine for wall art, shaped pieces or objects?
No. A tufting gun does all of it, and the cutting, gluing, carving and sewing are hand work either way. What a machine changes is the base underneath: the same height and density everywhere, every time — which matters most when an object is made of panels that have to match each other.
Can I get a carved relief effect in a single-colour piece?
Not much of one. Carving reads as depth because the eye catches the boundary between two colours, and a solid field has no boundary to catch. You can still get subtle texture — cut against loop pile, or a change of yarn — but actual relief needs a colour edge to cut along.
Can I use the same glue for a cushion as for a rug?
Better not to. Rug adhesive is made to hold a piece flat and firm; anything that gets squeezed, sat on or stuffed needs a backing that bends without splitting. Use a flexible latex.
Is a tufted lampshade safe?
Only with LEDs and adequate clearance. Acrylic yarn and heat are a bad combination, and pile is opaque — a tufted shade produces a glow around its edges rather than light through it. Treat it as a cover over an existing frame rather than as the shade itself.
Does wall art need a backing fabric at all?
Not strictly. Once the glue coat has cured the yarn is locked in; a backing layer mostly makes the reverse look finished. Felt or canvas if you want that, nothing if you don't. What you can skip either way is the non-slip layer, which exists only for pieces that get walked on.
My piece won't lie flat against the wall. Can I fix it?
If it curled while the glue cured off the frame, no — the yarn has set in that shape. Which is why the glue coat goes on with the piece still stretched, every time.
How big can a wall piece be before it needs a board?
There's no fixed threshold; it depends on density and how much unsupported width the piece has. The practical test: hold a finished piece by its top corners, and if the bottom edge waves noticeably, it wants a board. Long horizontal pieces reach that point sooner than tall narrow ones.

Share:
How to Fix the Most Common Tufting Mistakes