
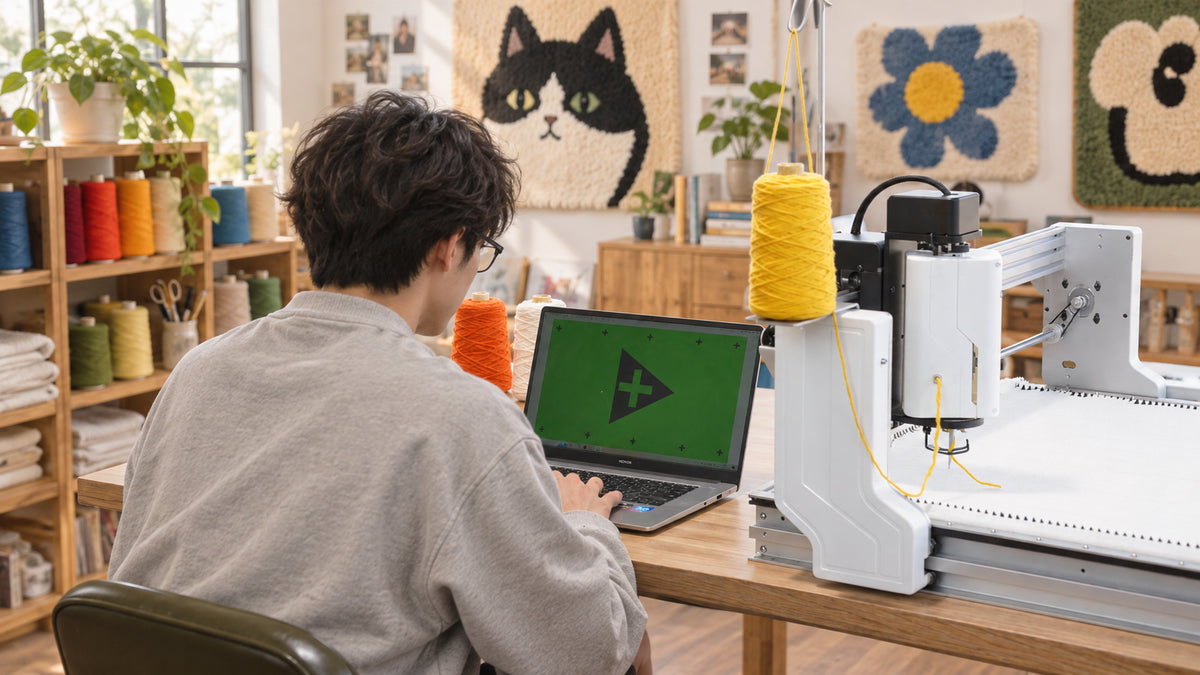
You don't need a dedicated workshop to tuft at home. You do need four things: room for your frame and the person using it, a stable surface, a clear path for yarn and cables, and a suitable place to glue and finish a piece.
How much of each depends on the tool. A tufting gun uses a frame you stand at or clamp in place. An automated machine needs a table that supports its full footprint. Before you buy anything, measure the setup you plan to use and decide where each stage of the work will happen.
Can you set up a tufting studio at home?
For most people, yes. A spare room, a garage, a basement or a well-planned corner can all work. What matters is whether the space supports the whole process — not just the part where you tuft.
Check four things first:
- The frame or machine sits securely. The surface under it can't wobble while you work.
- You can work without awkward reaching. There's room for you, your yarn feed, and every part of the frame you need to get to.
- Noise and cleanup fit your household. Tufting and trimming make noise and loose fibers. A hard floor and a routine you'll actually repeat make a shared room much easier to live with.
- There's a suitable place to glue and let a piece cure. Where and how depends on the adhesive you use — more on that below.
How much space do you need around a tufting frame?
There's no single room size that works for every setup. A tabletop frame, a freestanding frame and an automated machine all have different footprints. Start with the equipment's dimensions, then add the space it takes to use it.
| What to measure | Include |
|---|---|
| Equipment footprint | The full frame, stand or machine, including any expansion parts you plan to leave installed |
| Working position | Where you stand or sit to hold the gun, or to load and check the machine |
| Access | Room to reach the cloth, check the front of the piece, thread yarn and clear a snag |
| Yarn path | The cone holder or tray, plus a route that won't catch on the frame or cross a walkway |
| Finishing space | A surface for glue, backing, trimming and tools, big enough for the piece to lie flat |
| Storage | Somewhere for yarn, cloth, tools and work in progress between sessions |
Before you assemble anything, mark the footprint on the floor or table with painter's tape. Stand in the working position and walk through threading, moving around the frame and checking the front of a sample. If you have to twist around a chair or shift boxes every time, change the layout now — it's free at this stage.
For a Craftphilia machine, plan around the machine's full footprint, not the tufting area — the machine is always bigger than the piece it makes. The tufting areas are 50 × 50 cm on the CF05 and 70 × 70 cm on the CF07, or 50 × 100 cm and 70 × 140 cm with the Expansion Kit fitted. If you plan to fit the kit, measure for the expanded setup from the start; most owners leave it installed. Check the product page for the machine's exact dimensions and weight before you choose a table.
As a rule of thumb, a CF05 suits a standard desk or folding work table, while a CF07 — especially with its Expansion Kit — wants a dedicated surface such as a long workbench. The machine size guide covers choosing between the two, and the complete guide to automated tufting machines covers setup and workflow.
Choose the right room, corner or table
The best room is the one that keeps the work stable, visible and easy to clean.
A spare room lets you leave everything set up. Close the door when you tuft or trim, and keep yarn and tools in the same space.
A garage or basement gives you more room, but check the floor, lighting, temperature and power access first. A big space doesn't help if the frame is hard to see or the table shifts under pressure.
A shared room can work with a compact setup, as long as you can contain the fibers. Decide where the equipment lives between sessions and how you'll protect the floor before you start.
A table or bench has to support the whole machine or frame without rocking. For a handheld gun, use a stable stand or clamp the frame down. For a tabletop machine, check the footprint and weight against the table. A table that feels solid when it's empty can move once the cloth is under tension or the machine is running.
A hard floor is far easier to vacuum than carpet. If you have to work over carpet, lay down a washable drop cloth that reaches past the frame and the finishing area — and skip loose rugs underneath, which bunch underfoot and trap fibers.
Set up your tufting station
Plan the station as one system: the frame, the yarn and the light all have to work together, with cables kept clear of your feet and any moving parts.
Secure the frame at a comfortable height
For a handheld gun, the frame has to stay put when you press the tool against the cloth. Use a stable stand or a sturdy table with secure clamps, and set the working area at a height where your shoulders stay relaxed and the gun stays square to the cloth. If you're bending or reaching for every line, adjust the frame before you start.
For an automated machine, the table needs to support the machine across its full base, with room for the frame and any add-ons.
Keep the yarn moving freely
Place the cones where the yarn can travel to the tool without catching on a chair, a frame edge or a shelf. On a Craftphilia machine, the cones sit on the Dual Yarn Tray mounted on the machine. Before threading, pull a length of yarn along the route to check it runs freely. For multi-color work, keep the colors you're using within reach and store the rest together by color family.
Match the lighting to your method
With a gun, a task light aimed at the cloth helps you follow the marked design and catch missed lines. A projector helps transfer a design, though a simple first pattern can be drawn straight onto the cloth.
A Craftphilia machine follows the tufting path prepared in Craftphilia Studio, so it doesn't need a projector or a bright task light to guide each line. You still need good light to stretch the cloth, thread yarn, change colors and inspect the finished piece. For materials, see choosing tufting cloth and choosing yarn for tufting.
Divide the work into three areas
You don't need three rooms. You do need a clear place for each stage, so loose fibers, wet glue and clean finishing tools aren't all competing for the same surface.
| Area | What happens there | Helpful setup |
|---|---|---|
| Tufting | Stretch the cloth and thread yarn. With a gun, follow the marked design by hand; with a Craftphilia machine, run the prepared path. | Stable frame or machine table, clear yarn feed, floor protection. A task light helps with hand tufting. |
| Glue and curing | Apply adhesive and let the piece cure | Protected surface, room for the piece to stay flat, and the ventilation the adhesive calls for |
| Finishing | Add backing, trim, carve and inspect | Clear table, scissors and trimmer, a waste bin and a vacuum nearby |
In a small room, these can be separate stations on a folding table or a rolling cart. Keep the tufting floor clear while you work, leave a curing piece where it won't be bumped or covered, and move clean backing fabric and tools away from loose fibers before you finish.
Finishing takes space and time too: the piece has to cure before you cut it from the frame, back it and trim it. The full sequence is in what rug finishing involves.
What equipment do you need on day one?
Start with one complete workflow, not a room full of upgrades. Check what comes with your tool before buying materials separately.
- For a gun: a tufting gun, a stable frame or stand, primary tufting cloth, yarn, and a holder or feed path that won't snag. You'll also want a threader and sharp scissors.
- For a Craftphilia machine: the machine and a suitable table. The frame, Dual Yarn Tray, tufting cloth, a starter pattern and matching yarn for a first piece all come in the box. You'll also need a Windows or macOS computer for Craftphilia Studio.
- For either: adhesive and backing, a trimmer, floor protection, a vacuum and somewhere to store materials.
A projector helps with hand tufting but isn't needed with a machine. An extra frame, a big yarn collection and specialized carving tools can wait until a project gives you a reason. The cost guide breaks down equipment, materials and the time it takes to get started.
Manage noise, fibers, adhesive and cleanup
Tufting fits into a home much more easily when you plan for what happens around the work, not just the tool.
Noise and vibration. Tuft at considerate times, especially in an apartment or a shared home. Rubber pads under the frame's contact points can cut vibration through a table or floor, though they won't make a loud setup silent. If the tool starts rattling more than usual, check that the frame is stable and the yarn path hasn't snagged.
Loose fibers. Lay a washable drop cloth under the frame and keep a vacuum close. Pick up fibers as you go and vacuum before they travel into other rooms. Keep yarn and scraps in bins or bags between sessions.
Adhesive. Read the label and the safety data sheet (SDS) for the adhesive you choose — the right precautions depend on the product and how you apply it. Adhesives and hobby products can release solvents into the air, and the U.S. Environmental Protection Agency notes that levels can stay high indoors after you've finished using them. Its guidance on volatile organic compounds and indoor air quality recommends increasing ventilation and following label precautions. Spraying puts more into the air than brushing, and a small, closed room raises exposure. If a product calls for outdoor use or a respirator, follow that rather than assuming an open window is enough.
Cables and tools. Route power and USB cables away from walkways, wet glue and sharp gripper strips. Switch off and unplug a tufting gun before threading, adjusting or clearing a jam, and keep hands away from moving parts while any powered tool is running.
Budget for the work you want to do
- One-time setup: the tool and its support — a frame or stand for a gun, a suitable table for a machine — plus any storage or lighting your room actually needs.
- First-project supplies: cloth and yarn if they aren't included, plus adhesive and backing.
- Finishing and cleanup: scissors, a trimmer, floor protection, and a vacuum if yours isn't up to the job.
Then price the hours, not just the tools. With a gun, you guide every line by hand while you build consistency. With a Craftphilia machine, you prepare the design in Studio and the machine follows its path, running on its own between yarn-color changes, so your time goes into design decisions, color changes and finishing. That difference shapes the physical work, the time per piece and how many pieces you can make. Both routes use materials on every piece, and today both still finish by hand.
Our tufting gun vs automated machine comparison covers learning curve and time per piece; the cost breakdown covers setup and ongoing costs.
Test the setup with a small piece first
Before you commit to a large piece, use a small sample to test the room as well as the technique.
- Set up the frame or machine inside the marked footprint.
- Thread the yarn and check that it feeds without snagging.
- Vacuum the area and see whether your floor protection contained the fibers.
- Glue the sample and check that you have a good place for it to cure.
- Finish the sample, and note what was awkward: reaching, storage, cleanup, cable routing or table space.
Fix the layout before you scale up. Many early problems come from cloth tension, yarn feed or finishing rather than a missing piece of equipment — see how to fix the most common tufting mistakes before buying another tool.
Frequently asked questions
Do I need a separate room to tuft?
No. A dedicated room is convenient because everything can stay set up, but a shared room works if the setup is stable, the floor is protected and you have a plan for storage and cleanup.
Can I tuft in an apartment?
Often, yes. Measure the full setup, think about noise and vibration, and tuft at times that work for the people around you. Check the adhesive's instructions before deciding where gluing and curing will happen.
What's the minimum room size for a tufting studio?
There's no single minimum. Measure the equipment footprint, your working position, the yarn path, access to the front of the piece and the space you need for finishing — using the exact dimensions of the tool you plan to buy.
Can I glue and finish in the same room where I tuft?
That depends on the adhesive. Keep wet glue and curing pieces away from the active tufting area and your clean finishing surface, and use the ventilation and protective equipment the product specifies.
What should I buy first?
Start with the kind of work you want to do: learning to guide tufting by hand, or turning designs into finished pieces without steering every line. Then measure the largest piece you plan to make, choose a tool and a stable setup that fit the room, and budget for materials and finishing as well as the main equipment.

Share:
How to Sell Tufted Rugs: Markets, Custom Orders and Interior Designers